In this quick tip tutorial you will learn how to create a powerful emotional effect for your photos. By reading this tutorial you will be able to convert an ordinary looking photo into a beautifully striking one in 10 minutes or less.
What you’ll be creating
Quick-tip tutorial in 9 easy steps. Time to complete: 10 minutes. You will need Photoshop CS5 or newer to follow this tutorial.

Step 1
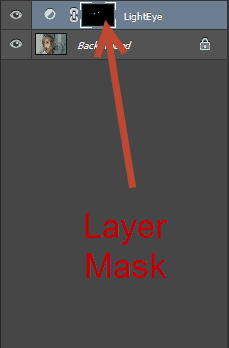
Create a Curves Adjustment layer (Layer > New Adjustment Layer > Curves) then set the blending mode to Screen. Press D to set the colors to default. Click on the layer mask of the curves layer and press Ctrl + Backspace to fill the mask with black. With a round soft white brush paint over the eyes (make sure you have clicked the layer mask before painting). If the eyes are too bright lower the opacity (in this specific case I lowered the Opacity to 55%).

Step 2
Create a Black & White Adjustment layer (Layer > New Adjustment Layer > Black & White) and set the blending mode to Multiply.

Step 3
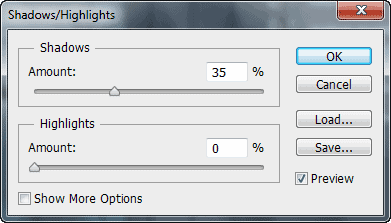
Press Ctrl + Shift + Alt + E to create a new layer from all the visible layers. Go to Image > Adjustments > Shadows/Highlights and play with the sliders in order to lighten the image a little bit. Drag the Highlights slider all the way to the left and drag the Shadows slider to the right until the image is a little bit lighter than before.

Step 4
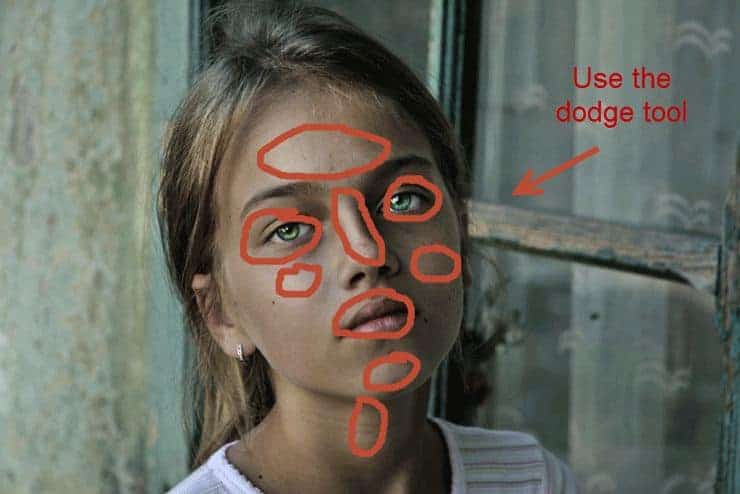
Press Ctrl + Shift + Alt + E to create a new layer from all the visible layers. Select the Dodge Tool (leave the default settings – Range: Midtones, Exposure: 50%) and paint over the following parts: eyes and especially the irises, tip of the nose, cheekbones, forehead, lips, tip of the chin, neck.
Step 5
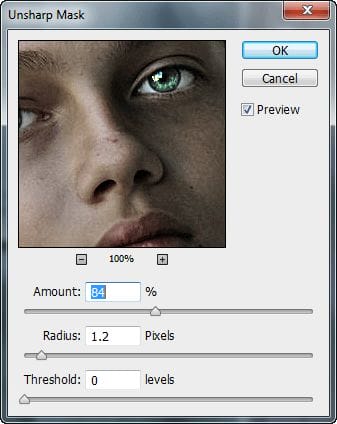
Press Ctrl + Shift + Alt + E to create a new layer from all the visible layers. Go to Filter > Sharpen > Unsharp Mask. Use a 1-2px radius and 50-100% Amount to sharpen the image. Try to achieve a fairly mild sharpen effect – too much will make it look bad. You can also lower the Opacity to lower the effect.

Step 6
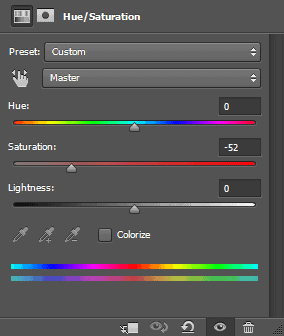
Create a Hue/Saturation Adjustment layer (Layer > New Adjustment Layer > Hue/Saturation). Drag the slider to the left until the image is fairly desaturated.

Step 7
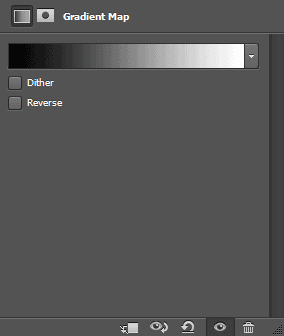
Create a Gradient Map Adjustment layer (Layer > New Adjustment Layer > Gradient Map) with the default settings (black and white). Set the blending mode to Soft light. This will increase the contrast.

Step 8
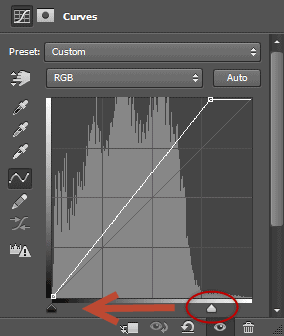
Create a Curves Adjustment Layer (Layer > New Adjustment Layer > Curves). Drag the right slider to the left in order to boost the highlights.

Step 9
This step is optional, follow it only if you want to add a little artistic effect.
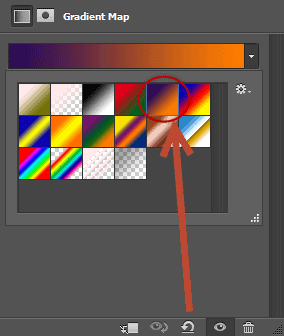
Create a Gradient Map Adjustment Layer and choose one of the colored presets. Set the blending mode to Soft Light and lower the Opacity if the effect is too strong.
![final-results[1] final-results[1]](http://www.photoshoptutorials.ws/wp-content/uploads/2014/08/finalresults1-1.jpg)
Below you can see some before and after comparison photos.


Final Results
![final-results[2] final-results[2]](http://www.photoshoptutorials.ws/wp-content/uploads/2014/08/finalresults2-1.jpg)
No comments:
Post a Comment