Turn any of your photos into a brick mosaic inspired by the official Lego photo app! This Photoshop tutorial will show you how to create the effect from any photo and it’s really easy to do. You’ll learn how to pixelate your photo, create a brick pattern and overlay it on top of your photo, and compress the bricks into a limited color palette to make it look more realistic. Follow this tutorial and create your own cool brick mosaic photo!
Video Tutorial
Preview of Final Results

Step 1
Open any image you like into Photoshop. We recommend using an image that’s at least 2000×2000 pixels. If your image isn’t large enough, you can use the Image Size tool (Image > Image Size) to resize it up – don’t worry about getting a blurry image from upscaling because we’ll be pixelating it anyways!
I’ll be using this image from ShutterStock. Simple photos like the one below will have better results than a busy photo (ex. cityscape photo).

Step 2
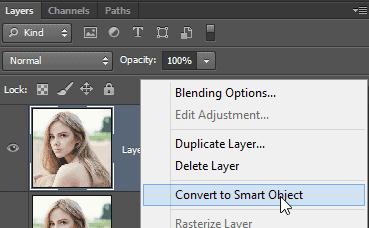
Duplicate the layer so that you have a backup copy. You can duplicate your layer by pressing Ctrl/Cmd+J. Rename this layer to “Bricks”. Right-click on the new layer then select “Convert to Smart Object”. By converting the layer into a Smart Object, we can apply Smart Filters which give you the option of changing your settings at a later time.
Step 3
Next, go to Filter > Pixelate > Mosaic. Adjust the Cell Size setting until you can barely make out the image. This setting will determine the size of your bricks. Remember the cell size setting because we’ll need it for the next step.

Step 4
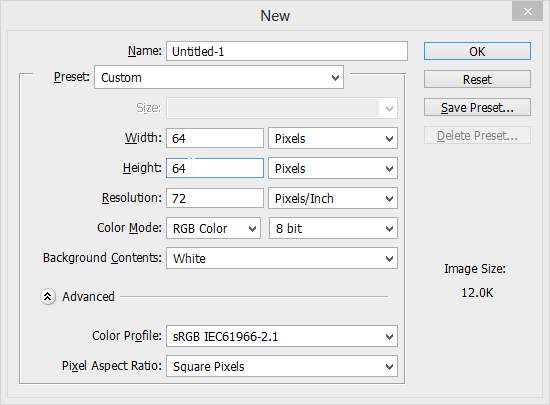
Create a new document (Ctrl/Cmd+N or File > New) with the same width and height as the cell size setting you used earlier. For example, if you used the Mosaic Filter with a cell size of 64 square, then you would create a new 64×64 pixels document.
Step 5
Press Shift+Backspace or go to Edit > Fill to open the Fill tool. In the drop down menu, select “50% Gray” then click OK.
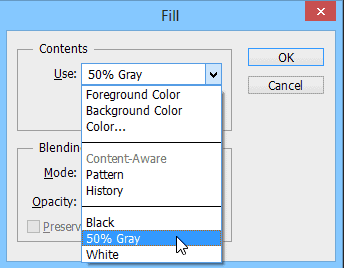
Your document will be filled with 50% gray.

Step 6
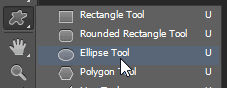
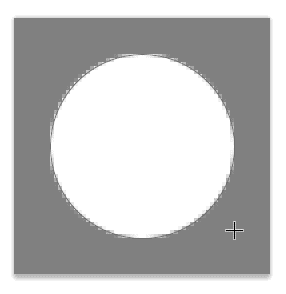
Select the Ellipse tool (U) then create a circle in the center (the color of the circle doesn’t matter). You can create a perfect circle by holding the shift key. Switch to the Move tool (V) to position it in the center of your document.
Step 7
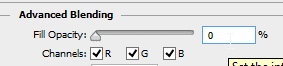
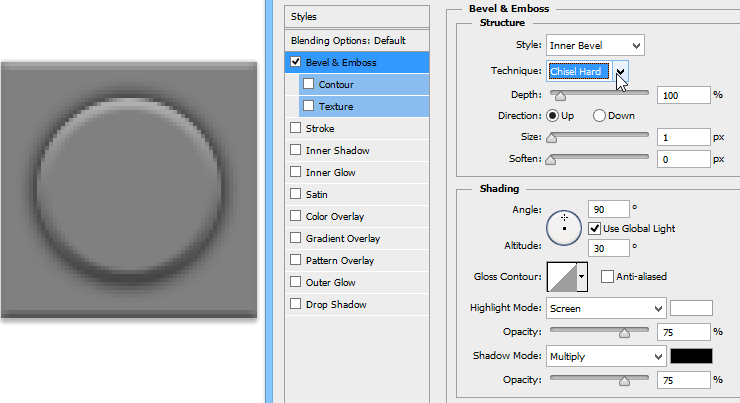
Now we’re going to turn create a bevel from the circle using layer styles. Go to Layer > Layer Style > Blending Options. Set the fill opacity to 0 – this will make everything but your layer styles invisible.
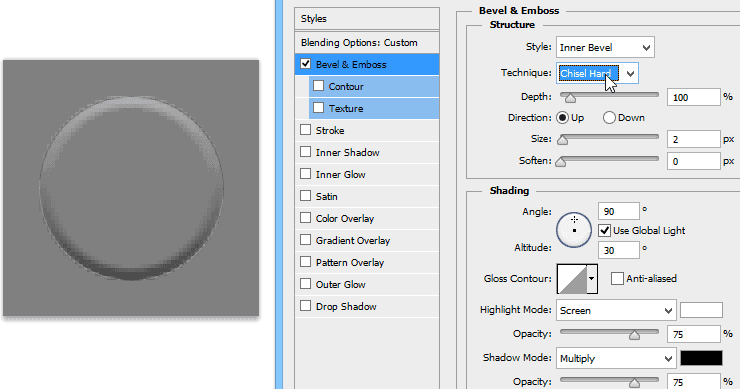
Select and checkmark the Bevel & Emboss layer style. Set the technique to “Chisel Hard” then adjust the size so that you get a bevel thickness like shown in the image below. You can also adjust the shading angle which is 120° by default – I changed mine to 90°.
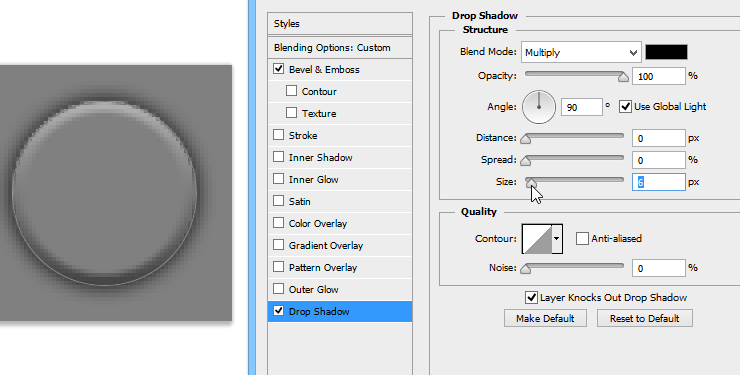
Next, enable the Drop Shadow layer style. Set the Distance to 0px then adjust the size so that it looks like the image below. Click OK to apply the layer styles when you’re done.
Step 8
We’re done creating the button in the center of the brick. Next, we’ll add a subtle bevel to the outer edge of the brick. To do this, we’re going to apply a layer style to the background layer, but before we can do that, we need to convert the Background layer into a regular layer. You can do this by double-clicking the background layer or right-clicking and choosing “Layer from Background”.
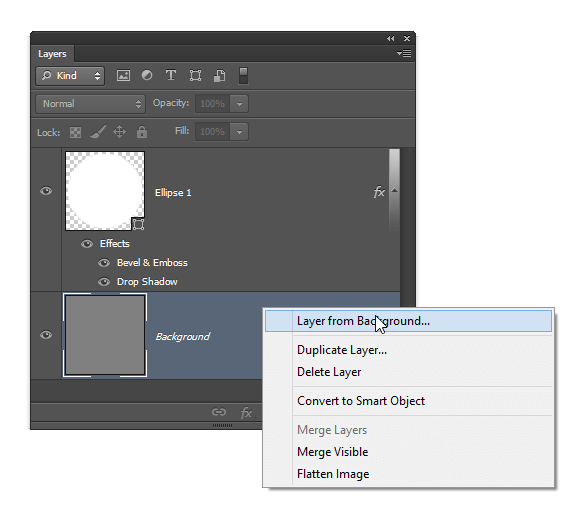
Right-click on the Background layer then choose Blending Options. Enable the Bevel & Emboss option then set the Technique to Chisel Hard and Size to 1-2px (so that it looks similar to the image below). If the bevel looks too strong, you can lower the Highlight/Shadow Opacity setting on the bottom. Click OK to apply the layer styles.
Step 9
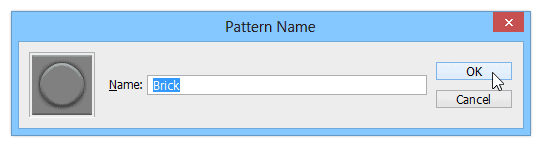
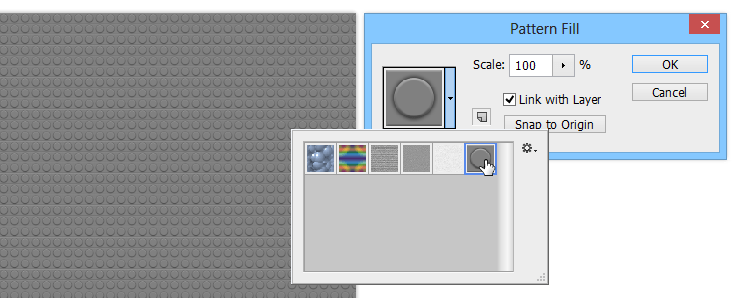
Now we need to turn this image into a pattern. Go to Edit > Define Pattern. Name it anything then click OK.
Step 10
Close the current document without saving and switch back to your main Photoshop document. Create a new Pattern adjustment layer by clicking on the New Adjustment Layer button in your Layers panel then selecting Pattern.
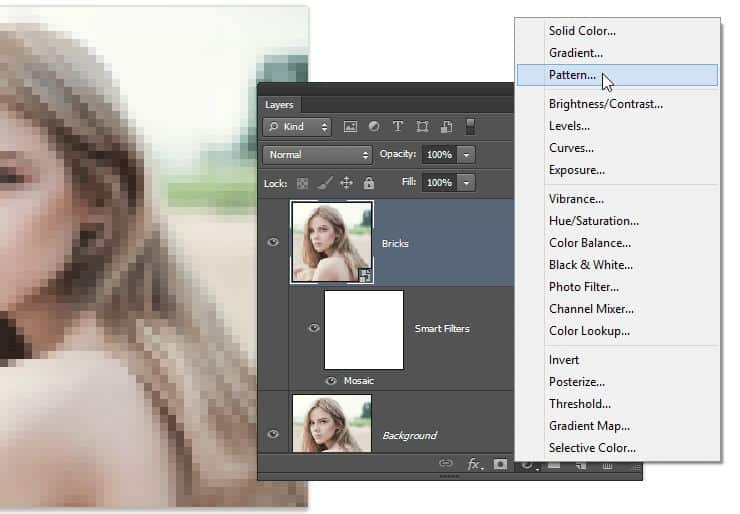
Select the brick pattern then click OK.
Step 11
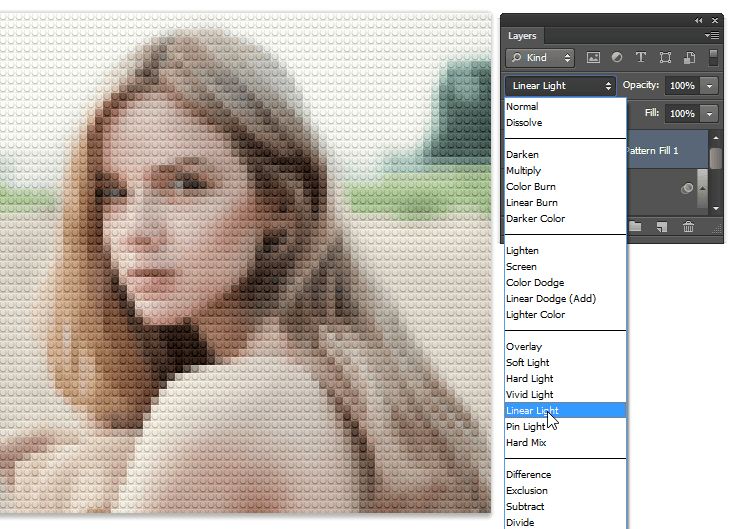
Change the blending mode of your layer to Linear Light. You’ll now have a brick image and this is what your photo will look like if bricks came in every color and shade.
Step 12
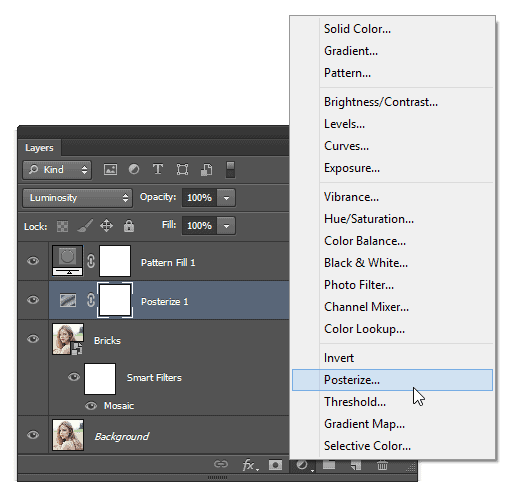
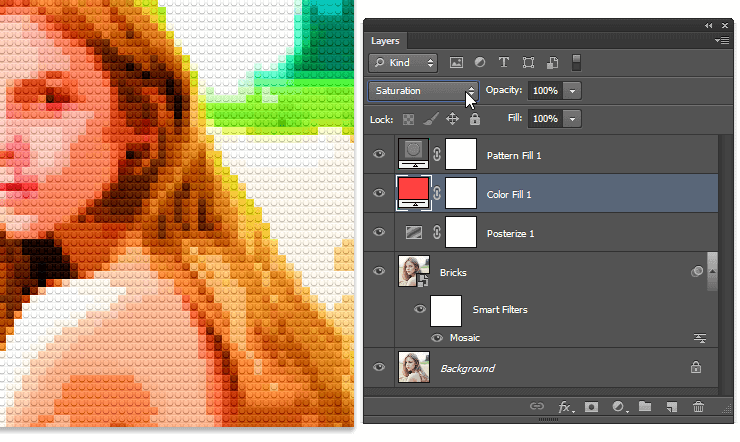
Because bricks don’t come in every color and shade, we need to compress it to a more limited color palette. We’ll do this with two layers; one to affect the tone and the other for the color. In your Layers panel, click on the New Adjustment Layer button then select Posterize. Move this layer below your Pattern Fill layer then change the blending mode to Luminosity. The Luminosity blend mode prevents your layer from affecting the colors in your image.
 =
=
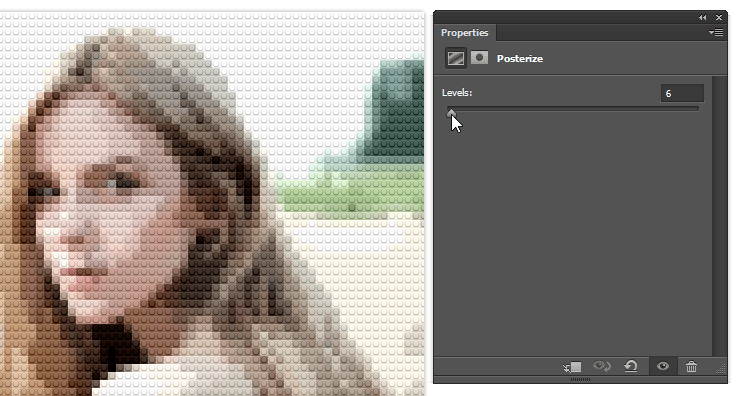
Adjust the Levels setting to anywhere from 4-8.
Step 13
Now we need to compress the saturation of the colors to a more limited range. To do this, create a new red Solid Color fill layer by clicking on the New Adjustment Layer button in your Layers panel and selecting Solid Color.
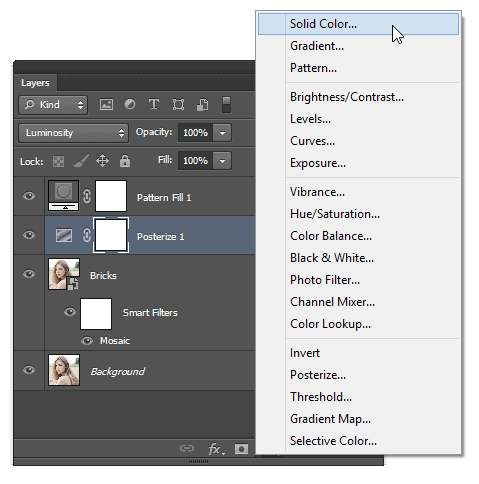
Pick any color then set the S (Saturation) to 75% and B (Brightness) to 100%. The H (Hue) can be any color. Click OK.
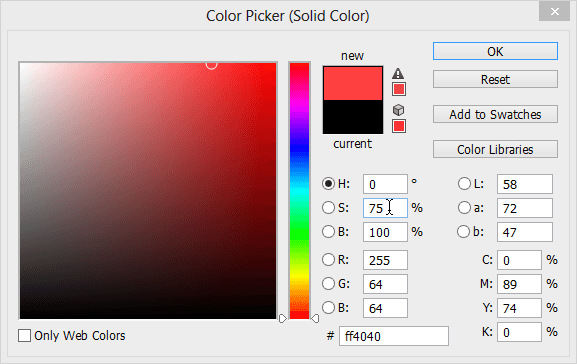
Move this layer below your Pattern fill layer then set the layer blending mode to Saturation.
Final Results
Here’s the final results! You can adjust the opacity of your Posterize layer if you need to bring back more tone into the image.
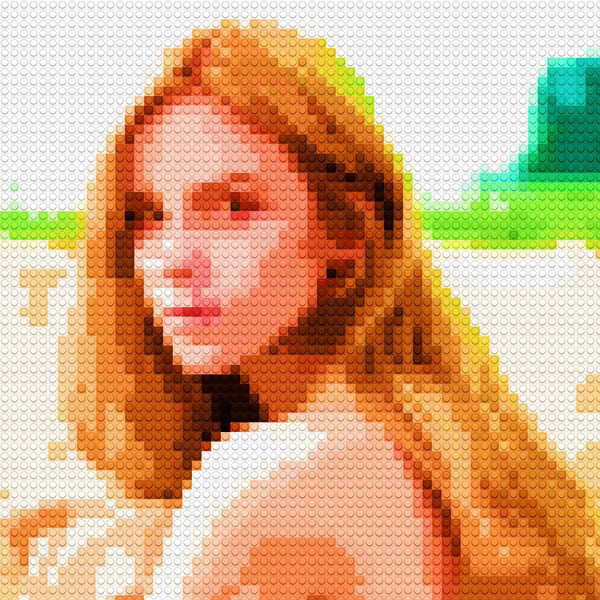
If you want your brick photo to look more like the official Lego Photo app, simply change the blending mode of your Posterize layer to Normal.

Download the PSD 65MB
photoshoptutorials.ws
No comments:
Post a Comment